Mission Impossible: Aurora OS on M1
May 28, 2023
Support for macOS on Apple silicon was added starting from version 5.2.
Preparation
First, on macOS, we need to enable SSH and directory access. To do this, go to System Settings -> General -> Sharing and enable Remote Login. After that, enable Allow full disk access for remote users.
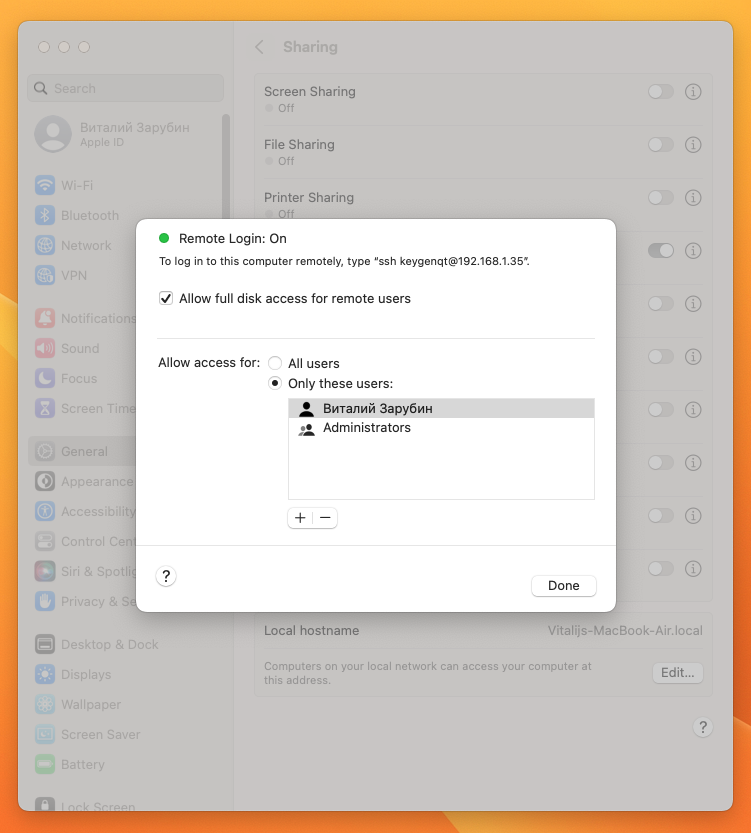
The same panel shows your IP and login, which will be needed for SSH connection. For me, it's ssh keygenqt@192.168.1.35. I recommend going into your router settings and assigning static local IPs so they don't change.
On the x86 machine, install Ubuntu server 24.04 with OpenSSH. During installation, I set the username to defaultuser. You can find the IP by installing net-tools and running the command:
ifconfig
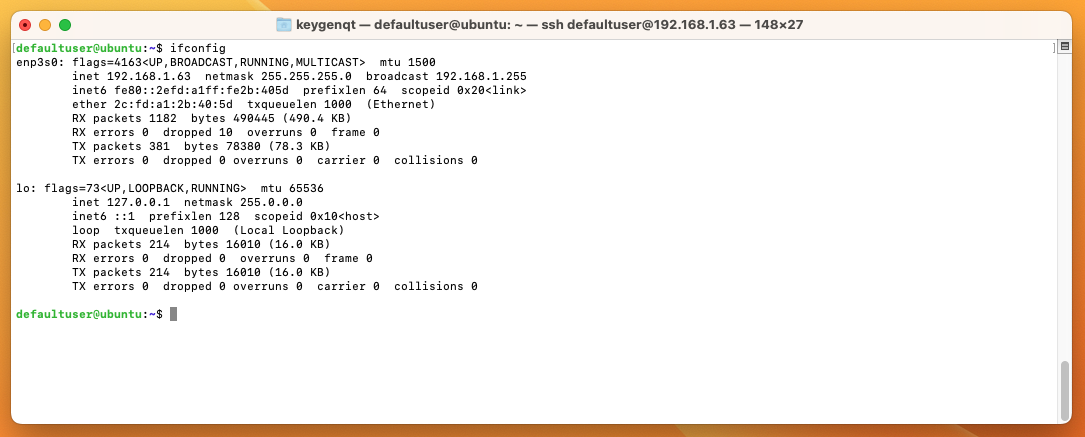
In summary, we should have:
- SSH enabled on macOS.
Allow full disk access for remote usersenabled on macOS.- An x86 machine with Ubuntu server 24.04 installed.
- OpenSSH installed on Ubuntu server.
And the data we will need for setup:
- macOS IP - for me, it's
192.168.1.35. - macOS user login - for me, it's
keygenqt. - Ubuntu server IP - for me, it's
192.168.1.63. - Server user login - for me, it's
defaultuser. - Passwords for both servers - for me, it's
the secret.
SSH
Open Terminal on macOS. The Ubuntu server can be put aside; it's accessible via SSH and won't be needed physically anymore. First, we need to exchange public keys for access.
I will provide commands based on my data; yours may differ.
Create a key on macOS:
ssh-keygen -t rsa
Add the key to the server:
ssh-copy-id defaultuser@192.168.1.63
Now we can log into the server without a password:
ssh defaultuser@192.168.1.63
Create a key on the server:
ssh-keygen -t rsa
Add the key to macOS:
ssh-copy-id keygenqt@192.168.1.35
This eliminates the need to enter passwords every time the machines access each other.
VNC Ubuntu Server
If you have an x64 device - a laptop - and you want to close it, you need to disable sleep. To do this, add the line HandleLidSwitch=ignore to /etc/systemd/logind.conf:
echo 'HandleLidSwitch=ignore' | sudo tee -a /etc/systemd/logind.conf

sudo systemctl mask sleep.target suspend.target hibernate.target hybrid-sleep.target
To install the Aurora SDK, which contains the emulator we need, a graphical interface will be required. We can set this up via SSH using VNC.
Install Xfce (a lightweight desktop environment for UNIX-like systems) on the server:
sudo apt install -y xfce4 xfce4-goodies
Install the VNC server, a dummy monitor, and necessary dependencies.
sudo apt install -y tightvncserver xserver-xorg-video-dummy dbus-x11 bzip2
Add dummy monitor settings:
read -r -d '' conf <<-EOF
Section "Device"
    Identifier  "Configured Video Device"
    Driver      "dummy"
EndSection

Section "Monitor"
    Identifier  "Configured Monitor"
    HorizSync 31.5-48.5
    VertRefresh 50-70
EndSection

Section "Screen"
    Identifier  "Default Screen"
    Monitor     "Configured Monitor"
    Device      "Configured Video Device"
    DefaultDepth 24
    SubSection "Display"
    Depth 24
    Modes "1920x1080"
    EndSubSection
EndSection
EOF

echo "$conf" | sudo tee -a /usr/share/X11/xorg.conf.d/xorg.conf
Set a password for the VNC server:
vncserver
Add the xstartup configuration:
read -r -d '' conf <<-EOF
#!/bin/bash
xrdb $HOME/.Xresources
startxfce4 &
EOF

echo "$conf" > ~/.vnc/xstartup

chmod +x ~/.vnc/xstartup
Add a systemd service configuration to start the VNC server on machine boot:
read -r -d '' conf <<-EOF
[Unit]
Description=Start TightVNC server at startup
After=syslog.target network.target

[Service]
Type=forking
User=defaultuser
Group=defaultuser
WorkingDirectory=/home/defaultuser

PIDFile=/home/defaultuser/.vnc/%H:%i.pid
ExecStartPre=-vncserver -kill :%i > /dev/null 2>&1
ExecStart=/usr/bin/vncserver -depth 24 -geometry 1920x1080 :%i
ExecStop=/usr/bin/vncserver -kill :%i

[Install]
WantedBy=multi-user.target
EOF

echo "$conf" | sudo tee -a /etc/systemd/system/vncserver@.service

sudo systemctl daemon-reload

sudo systemctl enable vncserver@1.service
After rebooting the device, you can check if everything is configured correctly:
sudo reboot

ssh defaultuser@192.168.1.63

sudo systemctl status vncserver@1.service
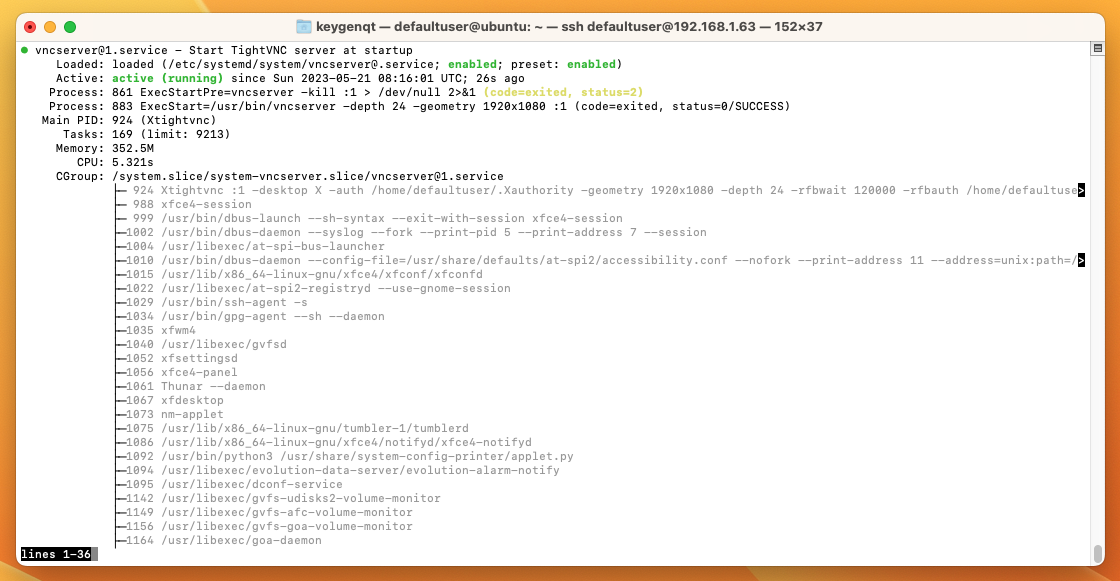
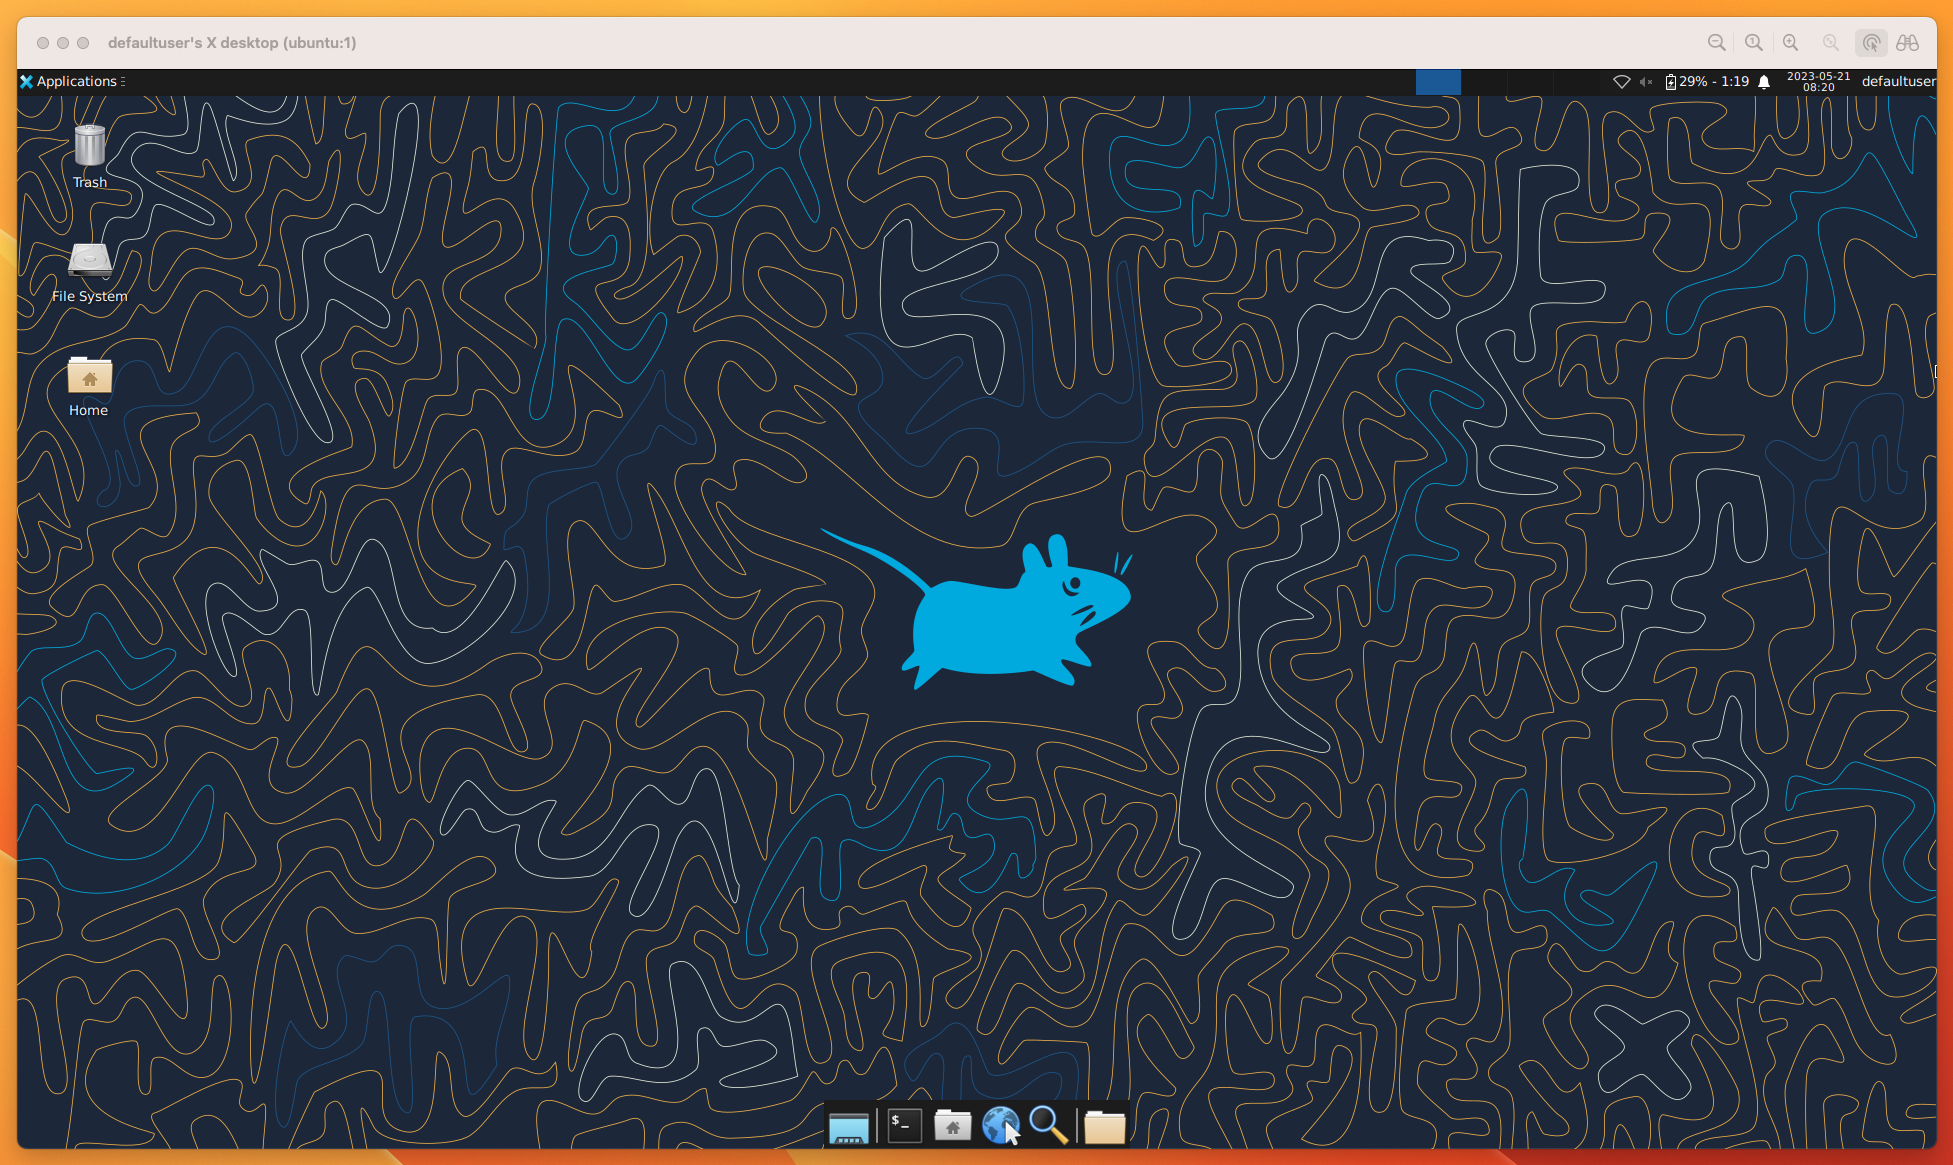
Now open Safari and enter in the URL: vnc://192.168.1.63:5901
Installing Aurora SDK
Now we need to install the SDK. Download it in the Ubuntu server terminal:
wget https://sdk-repo.omprussia.ru/sdk/installers/4.0.2/AppSDK/4.0.2.209/AuroraSDK-4.0.2.209-base-release-linux-64-online-22.11.28-12.12.29.run
We need VirtualBox for installation; let's install it:
sudo apt install -y virtualbox virtualbox-ext-pack
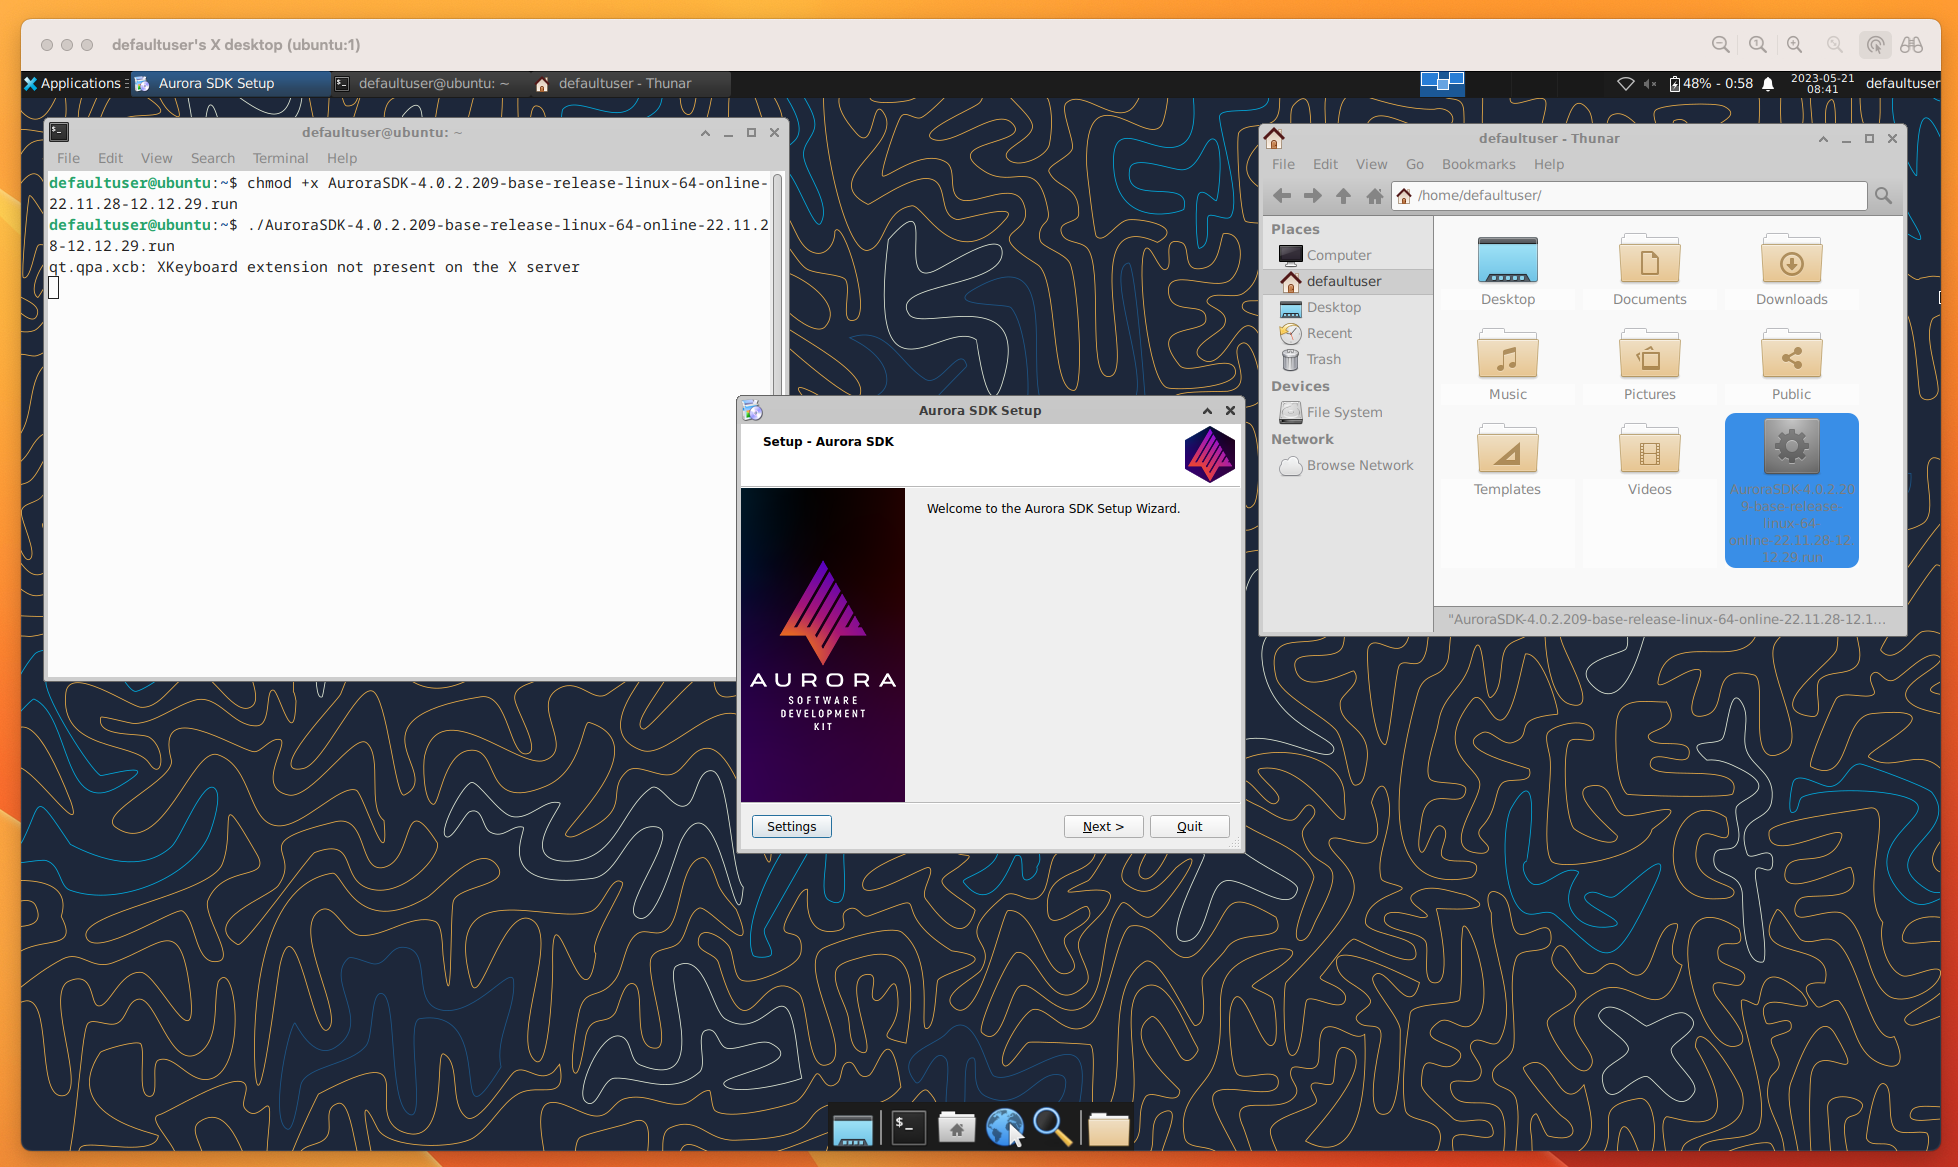
We can proceed to install the Aurora SDK via VNC. Nothing complicated here: run the downloaded *.run file. Select VirtualBox when prompted, and then just click Next, Next, Next...
chmod +x AuroraSDK-4.0.2.209-base-release-linux-64-online-22.11.28-12.12.29.run
./AuroraSDK-4.0.2.209-base-release-linux-64-online-22.11.28-12.12.29.run
Configuring VNC for the Emulator
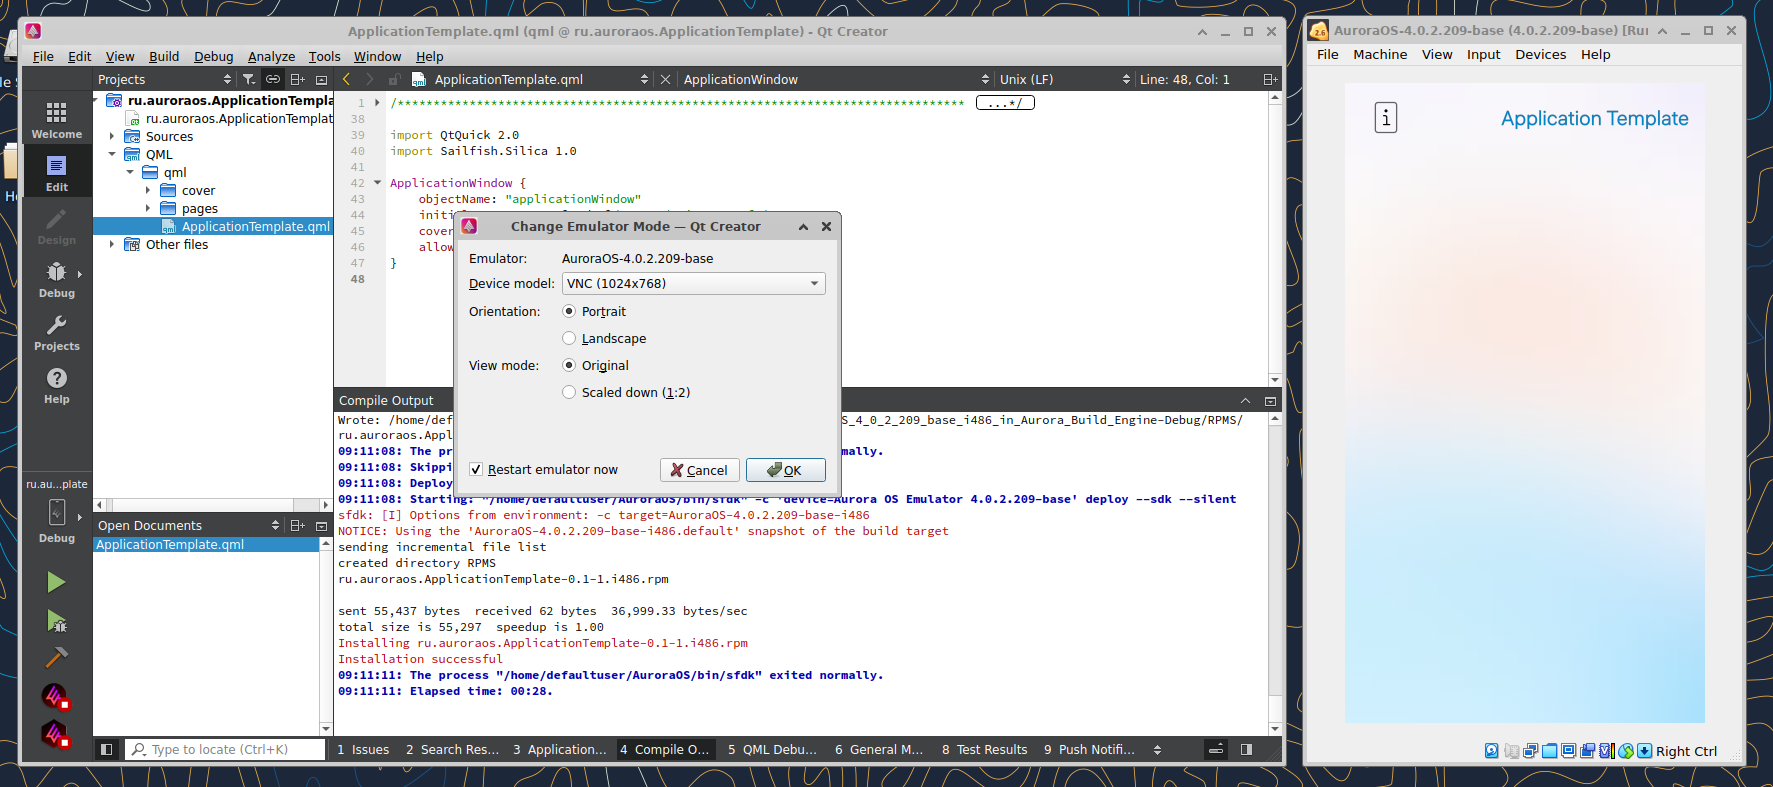
Now we can configure VNC for the emulator. Setting the emulator's position is tricky; I found a mode that allows it to be launched properly via VNC. We will run the VM in headless mode, and we need the emulator not to be sideways and to work at all. It's necessary to set a resolution supported by the video card. To do this, go to the Aurora IDE. In the menu, select Tools -> Options... -> Aurora OS -> Emulator Modes. Create a VM modification by clicking Add. Set the desired resolutions in a format familiar to the video card and save:
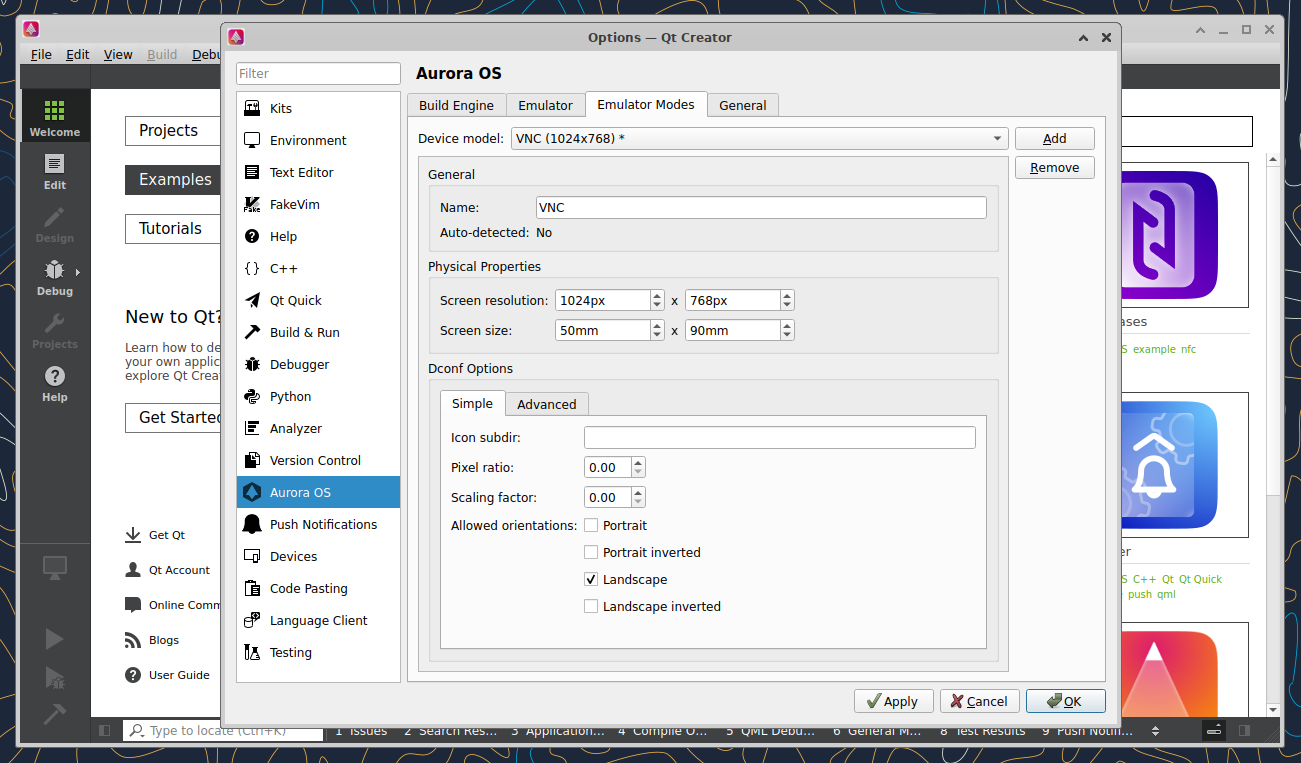
Now we need to set our emulator model. In the menu, select Tools -> Aurora OS -> Emulator Modes. If you get "Emulator is not Selected," just build a test example; the IDE will set everything up.
Next, go to VirtualBox and enable Remote Display in the emulator settings.
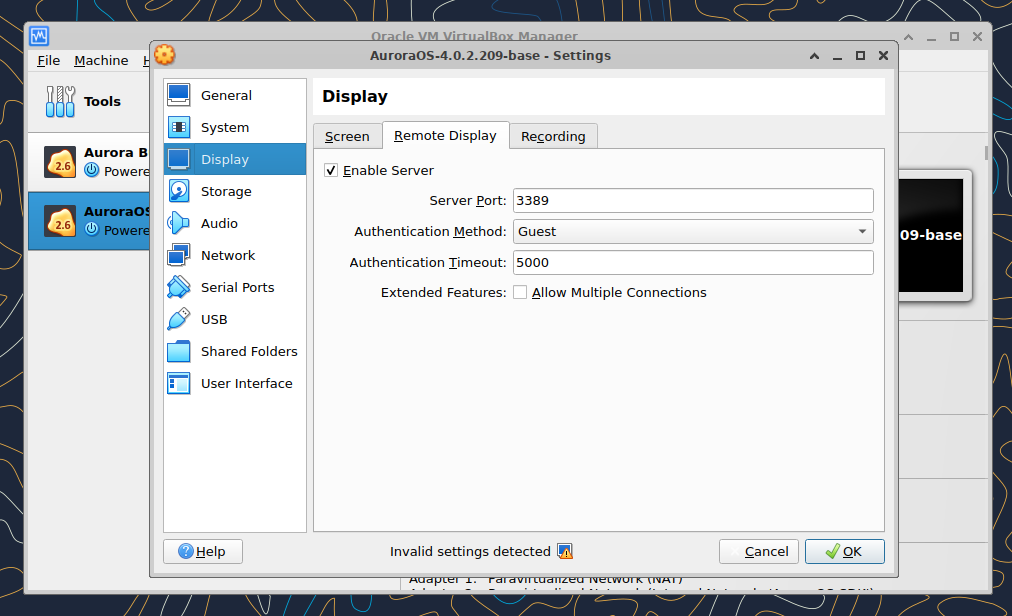
After applying the modification and enabling Remote Display, you can close the IDE, Emulator, and VNC and return to the macOS terminal. Tell VB we want to use VNC.
VBoxManage setproperty vrdeextpack VNC
Set a password for VNC access to the emulator:
VBoxManage modifyvm AuroraOS-4.0.2.209-base --vrdeproperty VNCPassword=00000
Add a systemd service configuration to start the VNC emulator on machine boot:
read -r -d '' conf <<-EOF
[Unit]
Description=VirtualBox VM AuroraOS-4.0.2.209-base
Requires=multi-user.target
After=multi-user.target
AllowIsolate=yes

[Service]
User=defaultuser
Group=defaultuser
Type=forking
Restart=no
TimeoutSec=5min
IgnoreSIGPIPE=no
KillMode=process
GuessMainPID=no
RemainAfterExit=yes
ExecStart=/usr/bin/vboxmanage startvm AuroraOS-4.0.2.209-base --type headless
ExecStop=/usr/bin/vboxmanage controlvm AuroraOS-4.0.2.209-base poweroff

[Install]
WantedBy=multi-user.target
EOF

echo "$conf" | sudo tee -a /etc/systemd/system/emulatorserver.service

sudo systemctl daemon-reload

sudo systemctl enable emulatorserver.service
After rebooting, you can check if everything works correctly:
sudo reboot

ssh defaultuser@192.168.1.63

sudo systemctl status emulatorserver.service
Open Safari and enter in the URL: vnc://192.168.1.63:3389
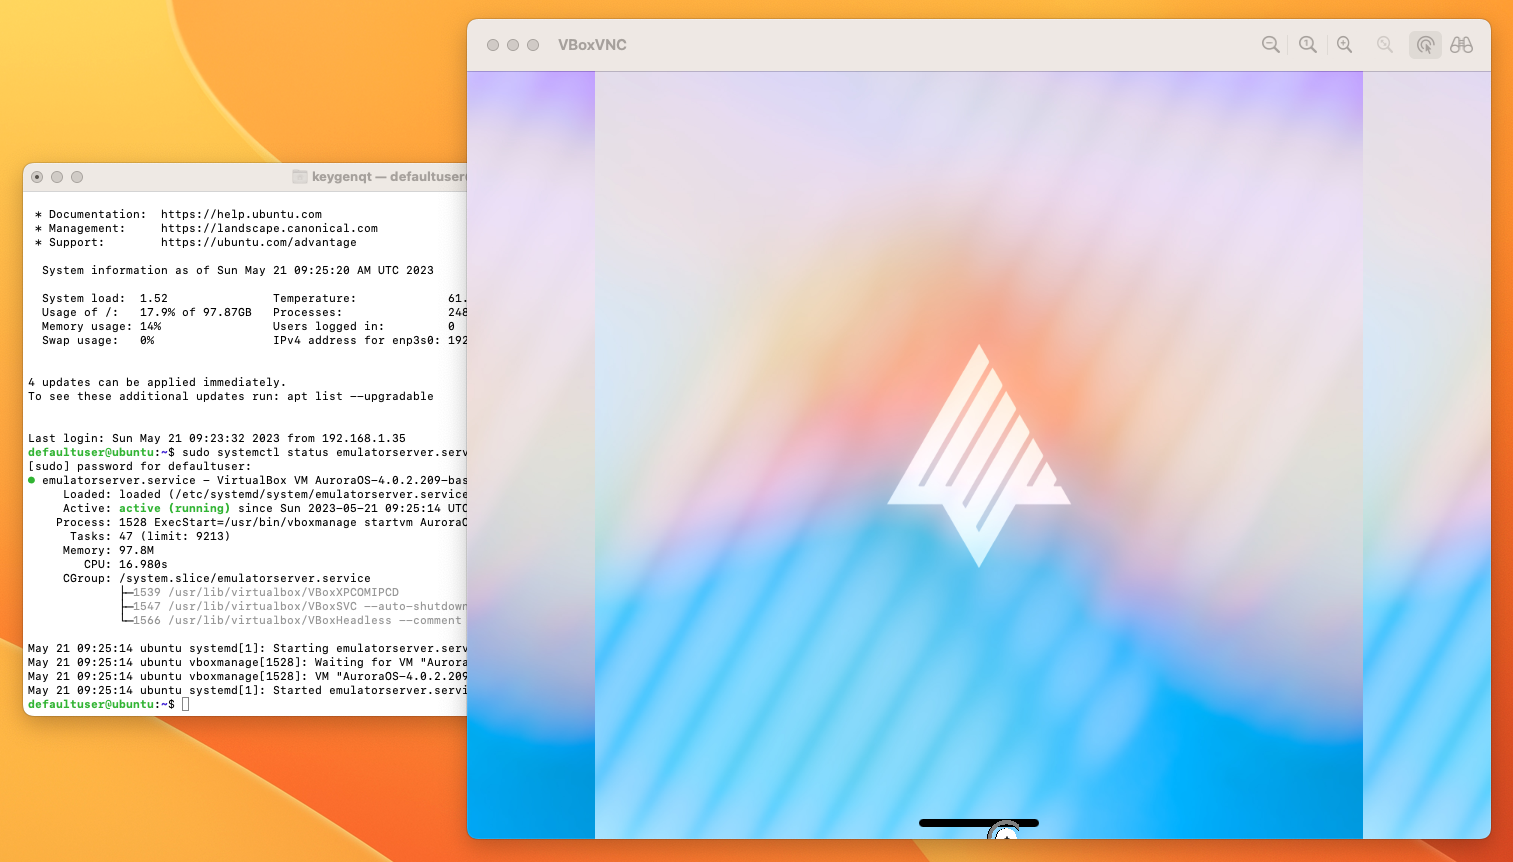
The edges will be cropped; just set a dark theme. This bug is known and will be fixed. You can SSH into the emulator like this:
ssh defaultuser@localhost -p 2223 -i ~/AuroraOS/vmshare/ssh/private_keys/sdk

ssh root@localhost -p 2223 -i ~/AuroraOS/vmshare/ssh/private_keys/sdk
SSHFS
To access the file system with projects, install SSHFS on the Ubuntu server:
The path to the project folder that will be accessible to the server is
/Users/keygenqt/Documents/Projectsfor me.
sudo apt install -y sshfs
Add permission:
echo 'user_allow_other' | sudo tee -a /etc/fuse.conf

sudo sshfs -o allow_other keygenqt@192.168.1.35:/Users/keygenqt/Documents/Projects ~/Projects
Add automatic mounting to systemd:
read -r -d '' conf <<-EOF
[Unit]
Description=Mount my remote filesystem over sshfs with fuse
After=network.target
After=tailscaled.service

[Install]
WantedBy=multi-user.target

[Mount]
What=keygenqt@192.168.1.35:/Users/keygenqt/Documents/Projects
Where=/home/defaultuser/Projects/
Type=fuse.sshfs
Options=allow_other,noatime,port=22,IdentityFile=/home/defaultuser/.ssh/id_rsa
EOF

echo "$conf" | sudo tee -a /etc/systemd/system/home-defaultuser-Projects.mount

sudo systemctl daemon-reload

sudo systemctl enable home-defaultuser-Projects.mount
After rebooting, you can check if everything works correctly:
sudo reboot

ssh defaultuser@192.168.1.63

sudo systemctl status home-defaultuser-Projects.mount
If everything is configured correctly, the folder with projects will be mounted in the Ubuntu system.
Aurora Platform SDK
To build projects, install the Aurora Platform SDK. On the Ubuntu server, download the necessary packages:
wget https://sdk-repo.omprussia.ru/sdk/installers/4.0.2/PlatformSDK/4.0.2.209/Aurora_OS-4.0.2.209-base-Aurora_Platform_SDK_Chroot-i486.tar.bz2
wget https://sdk-repo.omprussia.ru/sdk/installers/4.0.2/PlatformSDK/4.0.2.209/Aurora_OS-4.0.2.209-base-Aurora_SDK_Tooling-i486.tar.bz2
wget https://sdk-repo.omprussia.ru/sdk/installers/4.0.2/PlatformSDK/4.0.2.209/Aurora_OS-4.0.2.209-base-Aurora_SDK_Target-i486.tar.bz2
wget https://sdk-repo.omprussia.ru/sdk/installers/4.0.2/PlatformSDK/4.0.2.209/Aurora_OS-4.0.2.209-base-Aurora_SDK_Target-armv7hl.tar.bz2
Install:
mkdir -pv ~/AuroraPlatformSDK/sdks/aurora_psdk

echo 'export PSDK_DIR=~/AuroraPlatformSDK/sdks/aurora_psdk' >> ~/.bashrc

echo 'PS1="[AuroraPlatformSDK]$ "' > ~/.mersdk.profile

exec bash

sudo tar --numeric-owner -p -xjf ./Aurora_OS-4.0.2.209-base-Aurora_Platform_SDK_Chroot-i486.tar.bz2 --checkpoint=.1000 -C $PSDK_DIR

$PSDK_DIR/sdk-chroot sdk-assistant tooling create \
Aurora_OS-4.0.2 \
./Aurora_OS-4.0.2.209-base-Aurora_SDK_Tooling-i486.tar.bz2

$PSDK_DIR/sdk-chroot sdk-assistant target create \
AuroraOS-4.0.2-i486 \
./Aurora_OS-4.0.2.209-base-Aurora_SDK_Target-i486.tar.bz2

$PSDK_DIR/sdk-chroot sdk-assistant target create \
AuroraOS-4.0.2-armv7hl \
./Aurora_OS-4.0.2.209-base-Aurora_SDK_Target-armv7hl.tar.bz2

rm Aurora_OS-4.0.2.209-base-Aurora_*

$PSDK_DIR/sdk-chroot sdk-assistant list
We're done setting up the Ubuntu server. Now we have everything we need:
- VNC server.
- VNC emulator.
- Access to the macOS file system.
- Aurora Platform SDK, which we can use to build Aurora OS projects.
Building a Project
The server is ready. All that's left is to add a few scripts on macOS for interacting with the server where we can build projects for Aurora OS. I made 3 scripts:
build.sh- build the project.install.sh- install the RPM on the emulator.run.sh- run the application on the emulator.
They are executed in the project directory. Install the scripts:
git clone https://github.com/keygenqt/aurora-m1.git
mv aurora-m1/scripts ~/aurora_scripts
In the scripts, you will need to adjust 2 variables to your data:
SERVER_USER='defaultuser'
SERVER_IP='192.168.1.63'
vim ~/aurora_scripts/build.sh
vim ~/aurora_scripts/install.sh
vim ~/aurora_scripts/run.sh
Add aliases for convenience:
echo 'alias aurora_build="~/aurora_scripts/build.sh"' >> ~/.zprofile
echo 'alias aurora_install="~/aurora_scripts/install.sh"' >> ~/.zprofile
echo 'alias aurora_run="~/aurora_scripts/run.sh"' >> ~/.zprofile
source ~/.zprofile
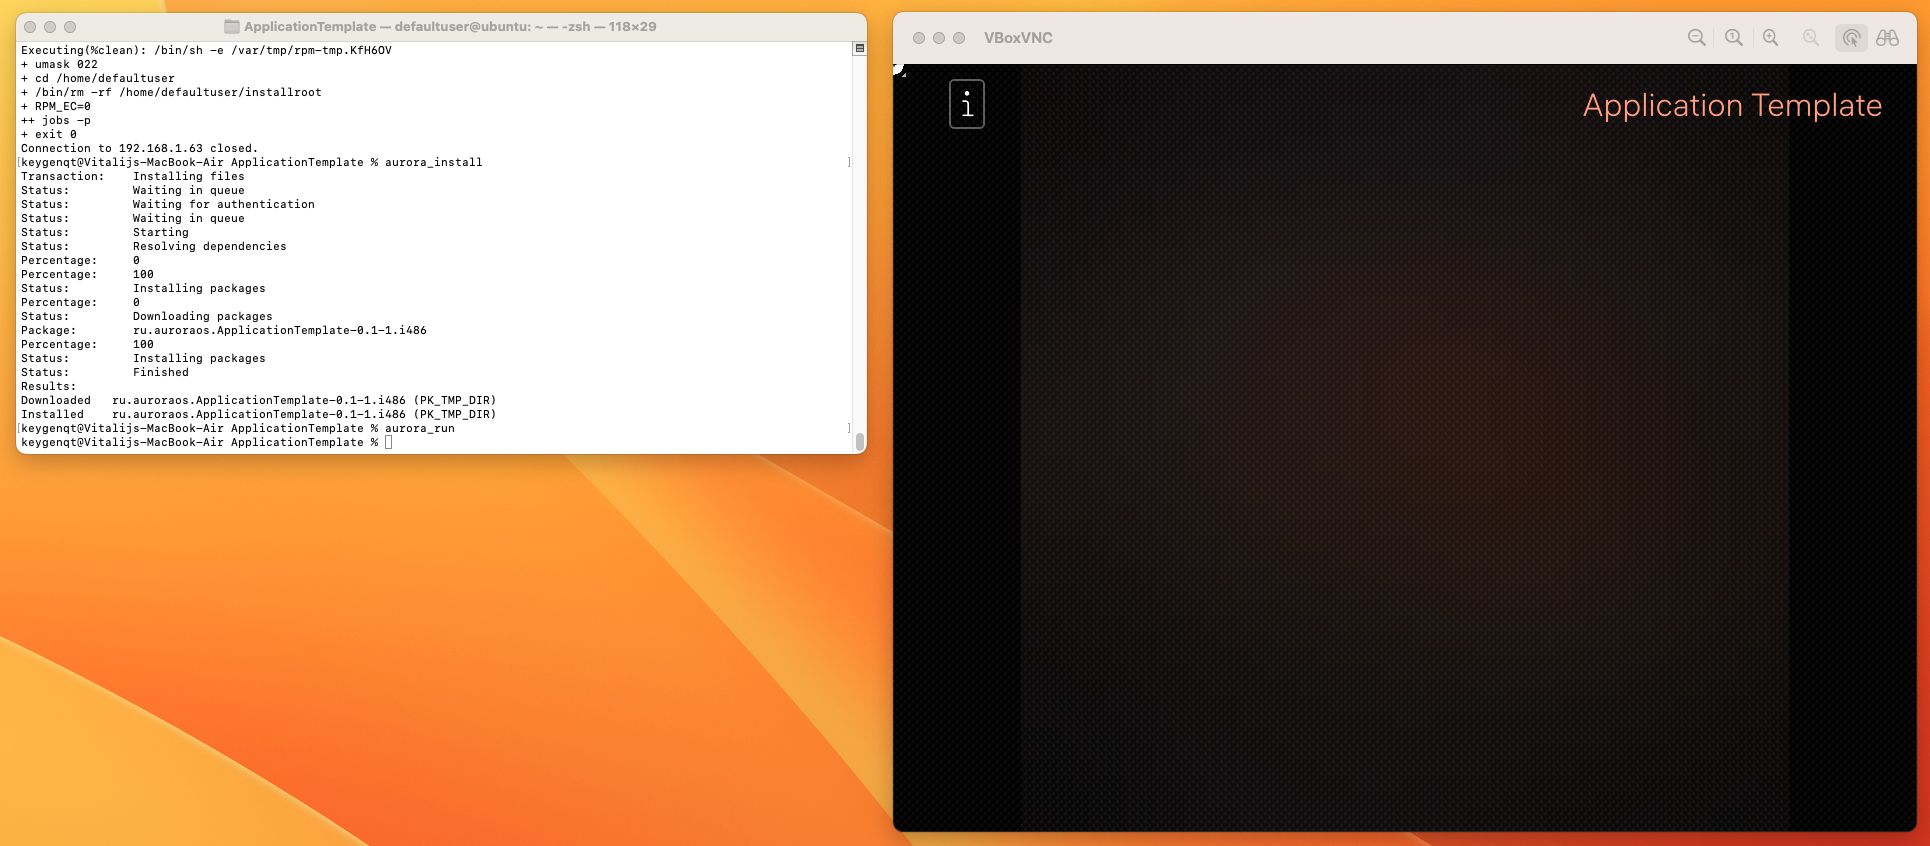
Now you can build your first project on "Apple silicon":
cd /Users/keygenqt/Documents/Projects

git clone git@os-git.omprussia.ru:external_examples/ApplicationTemplate.git

cd ApplicationTemplate

aurora_build
aurora_install
aurora_run